
EDUCATE MODULES
Below are list of eduCATE modules:
STUDENT MANAGEMENT SYSTEM consists of four main portlets:
Academic Setup - educate.sis.AcademicStructurePortlet
Bursary - educate.sis.BursaryPortlet
Enrollment - educate.sis.RegistrationPortlet
Examination - educate.sis.ExaminationPortlet
LEARNING MANAGEMENT SYSTEM (LMS) is available from one portlet:
educate.lms.CollabPortlet
LEARNING CONTENT MANAGEMENT SYSTEM (LCMS) is accessible through the LMS.
LIBRARY MANAGEMENT SYSTEM consists of four portlets as below:
educate.sis.library.BookLoanModule
educate.sis.library.BookReturnModule
educate.sis.library.CatalogueModule
educate.sis.library.BookInventoryModule
All the above portlets must be registered into the LeBAH portal in order for them to be available. The process of registering these portlets are done by the Portal Administrator.
To login as Portal Administrator, use this username/password:
username = admin
password = admin
After logged in, you may get a page like below. On the top right corner, you may see list of roles assign to this user. In the figure below, this admin user has three roles – Root, Teacher, and Academic Affair. A default role for this admin user is Root. This is the most powerful role in the system. This role is used to manage the portal – users and modules management.
When you click on the role, the portal view may change accordingly. For now, let's keep as Root role to do some modules registration.
Note: LeBAH pages for a role is customizable. You can change the page layout, use different arrangements of portlets, and change the title, of the tabs (the top menu) and the left menu. You can see the Personalize link on top-right corner (when you are in the Root role).

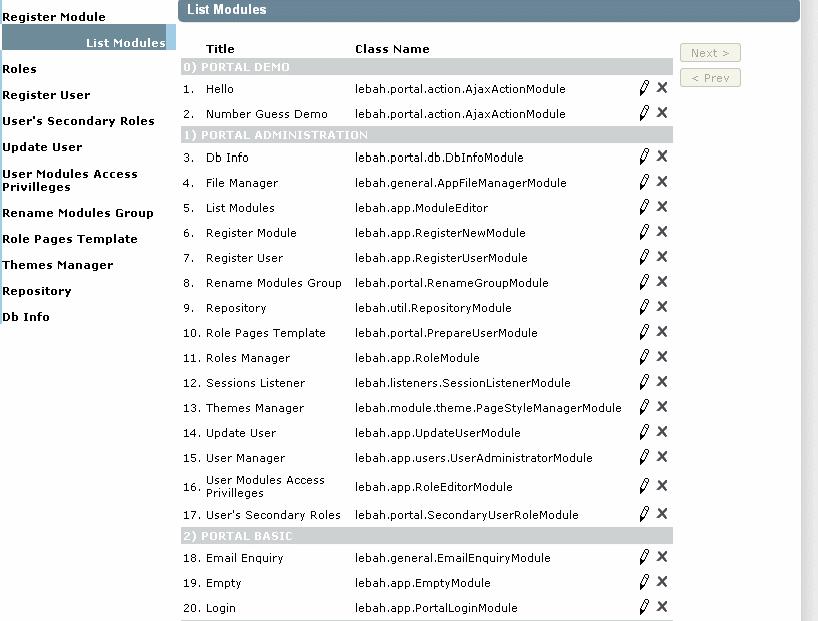
To view list of modules already registered into this portal, click on List Modules. You will get a page like below:
Scroll down, and you shall see a group name SIS_PORTLET. (SIS stands for Student Information System). The group name is merely a name created by the Portal Administrator where you can change to any name that suit you.

There are four portlets already registered for you. These portlets are grouped under one group called SIS_PORTLET because they belong to the Student Information System (or Student Management System – whichever name you like).
Registering a Module in the LeBAH portal
Let's add some portlets for the Learning Management System and the Library Management System. Follow the steps below:
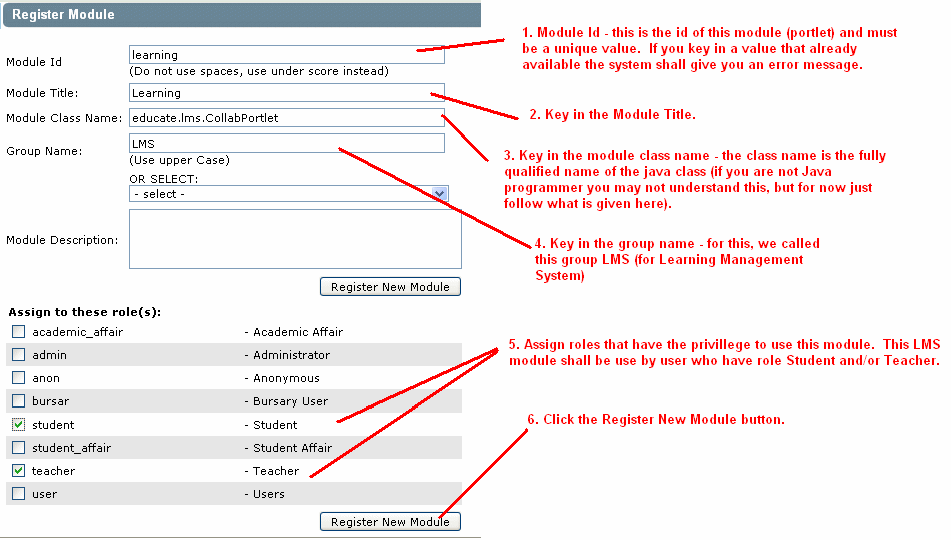
Click on Register Module, and fill in the field as shown below:
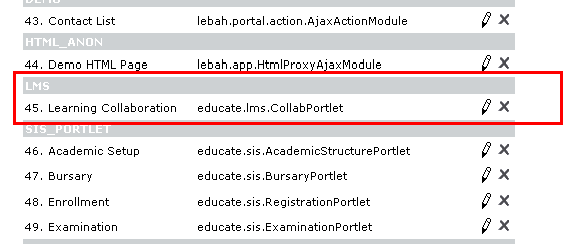
You shall see the module is available in the Module List under group called LMS. Click on the List Modules to get this list.
Setting Up Roles and Page Templates for the Roles
Every roles in the LeBAH portal have their portal's pages prepared by the Portal Administrator. The pages are identified by Tabs, and each tab consists of several modules.
First you need to create a Role. Click on the Roles to open the Roles form, as shown below.
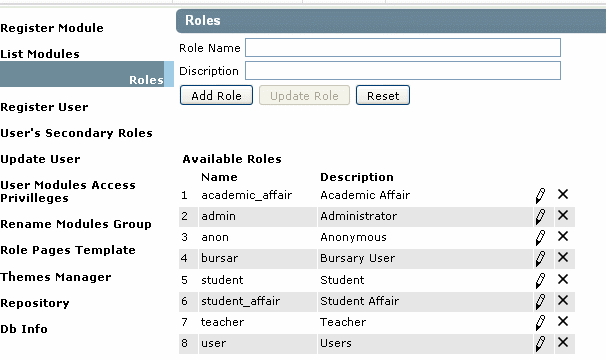
To add a role, just key in the Role Name (required) and the Description of the role (optional). Then click the Add Role button. For example, create a role name academic_administrator.

This role is created for users who want to use the Student Management System. After a new role has been created, we need to create portal's view for it. This is called Role Pages Template. To be able to add modules, this role must have privileges to access those modules. Because, we just created this role, there no modules assign to it yet.
To assign module to this role, click on the User Modules Access Privileges.
Select the role academic_administrator from the Select Role dropdown list.
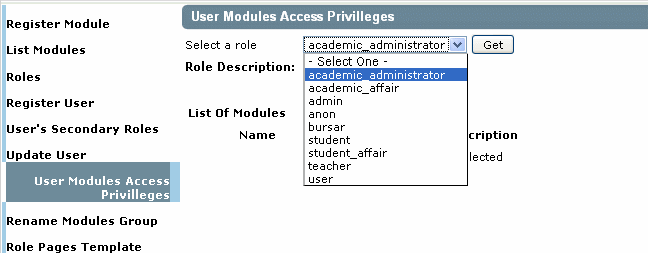
Select the newly created Role from the Select Role dropdown list, and click the Get button.
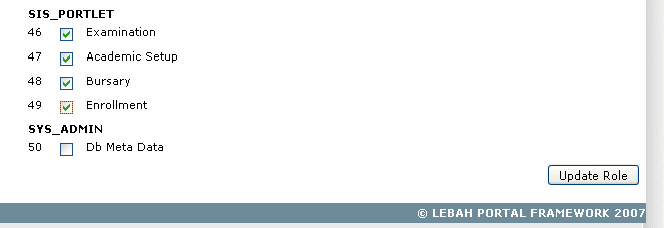
A list of all available modules in the portal are shown as below. Locate the group of modules called SIS_PORTLET, and check all the modules under this group, then click the Update Role button.
Now, we need to setup pages for this newly created role.
Click on the Role Pages Template.
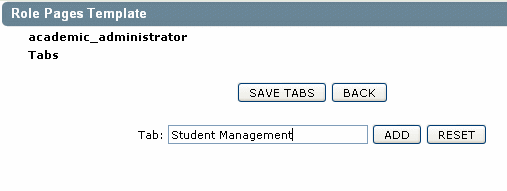
Select role academic_administrator.

Key in the Tab name, for example: Student Management.
And
click the ADD button. The tab is now shown as below. A tab represent
a page, that shall have at least one module. To add module (or
modules), click on the Modules link for the Tab you want to
add/remove modules.

You shall get below page.

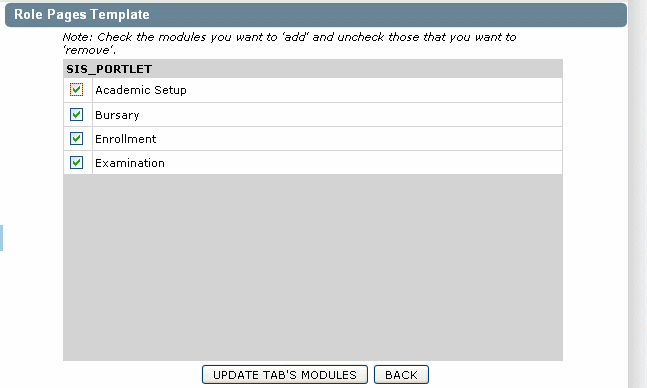
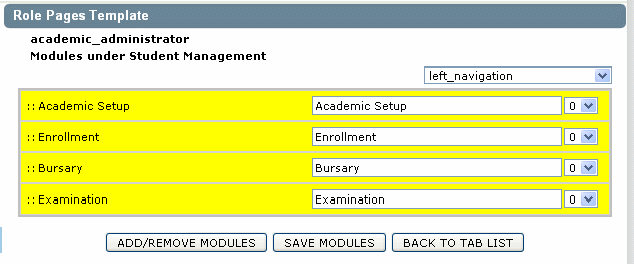
Click on the ADD/REMOVE MODULES button. You shall get a page as shown below. Click all the modules under SIS_PORTLET group, and click the UPDATE TAB'S MODULES button.
You shall a get a page like this. You can drag and drop the title (the yellow area) to rearrange the sequence the tabs. When done click the SAVE MODULES button.
ADDING A NEW USER
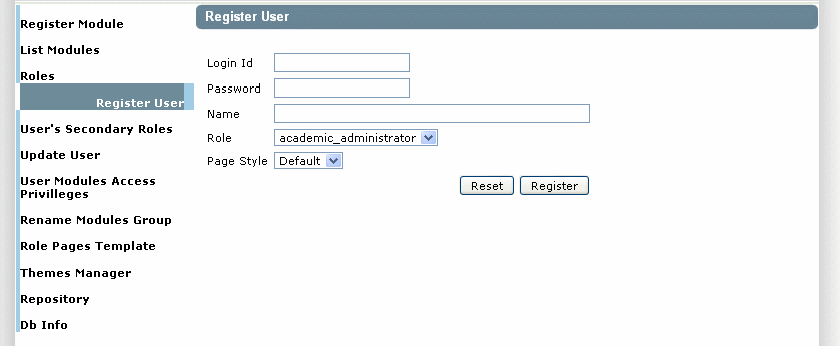
You must have a user assign to this newly created role. To add new user, click on the Register User. A page form like below will be displayed.
Key in the Login Id, Password, Name.
Select the role for this user – select the newly created role, academic_administrator.
You can leave the Page Style as Default or select other Page Style from the list.
And when done, click the Register button.
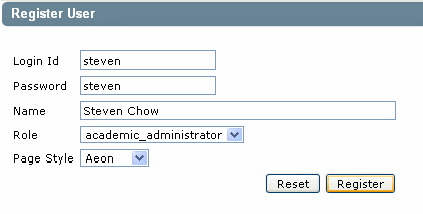
In this example, a user with login id steven, password steven, Name Steven Chow, Role as academic_administrator and Page Style Aeon is created as below:
Let's test this newly created user with the role academic_administrator. But first, you must log out from current user. And log in again using username steven and password steven.

Click the Login button. You shall get a portal page as below.

Well, looks like, the menu appear on the left side, does not seem very much a proper way to display a page. Let's change the layout, so that the menu appear at the top.
Log out from user steven, and log in again as a Portal Administrator (username=admin, password=admin).
Click on the Role Pages Template, and select role academic_administrator.
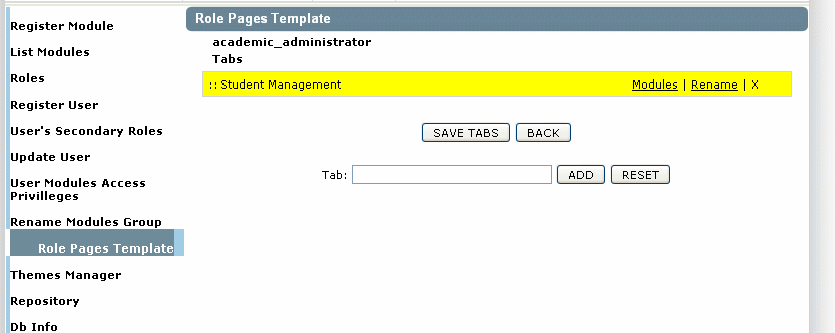
On the Student Management click the Modules link.
The type of available layouts are shown in the dropdown list at the top of the modules list. The default layout is left_navigation. Change this layout to top_navigation, and click the SAVE MODULES button.
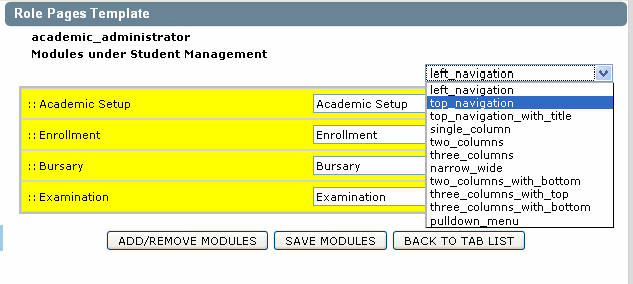
Now, let's test this user steven again. Log out from user admin, and log in as user steven. You shall get a portal page like as shown below:
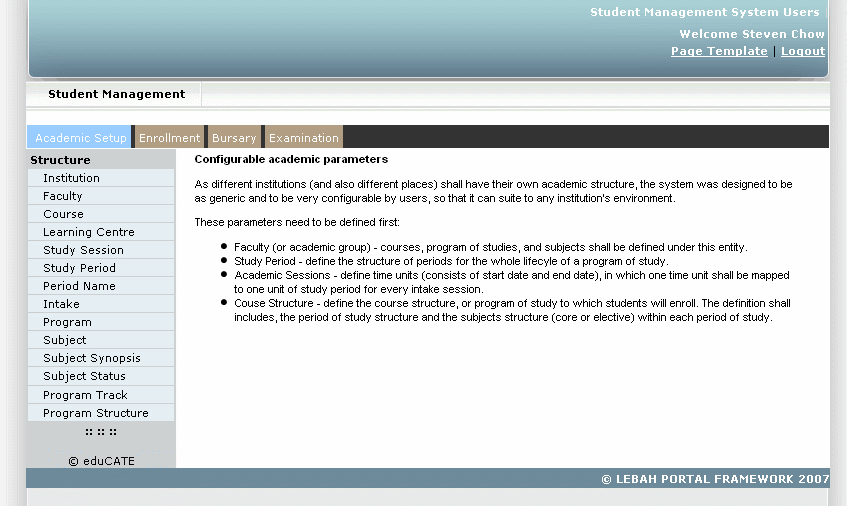
This layout seems much better.
Now this user (steven) can use the Student Management System. You can create as many users as you want and assign them this role.
Good Luck!